Tarp Initial Setup
Initial setup guide for your ANDA ultra light tarp. This video walks you through the contents you will receive with your ANDA tarp and how to set it up before you take it out on your first hike.
Bivy Initial Setup
Initial setup guide for your ANDA ultra light bivy. This video walks you through the contents you will receive with your ANDA bivy and how to set it up before you take it out on your first hike.
How to Setup Bivy
This video walks you through some options to setup and use your ANDA Burrito Bivy out in the wild. You can use your ANDA bivy with any tarp shelter but was purpose built to be used with an ANDA tarp.
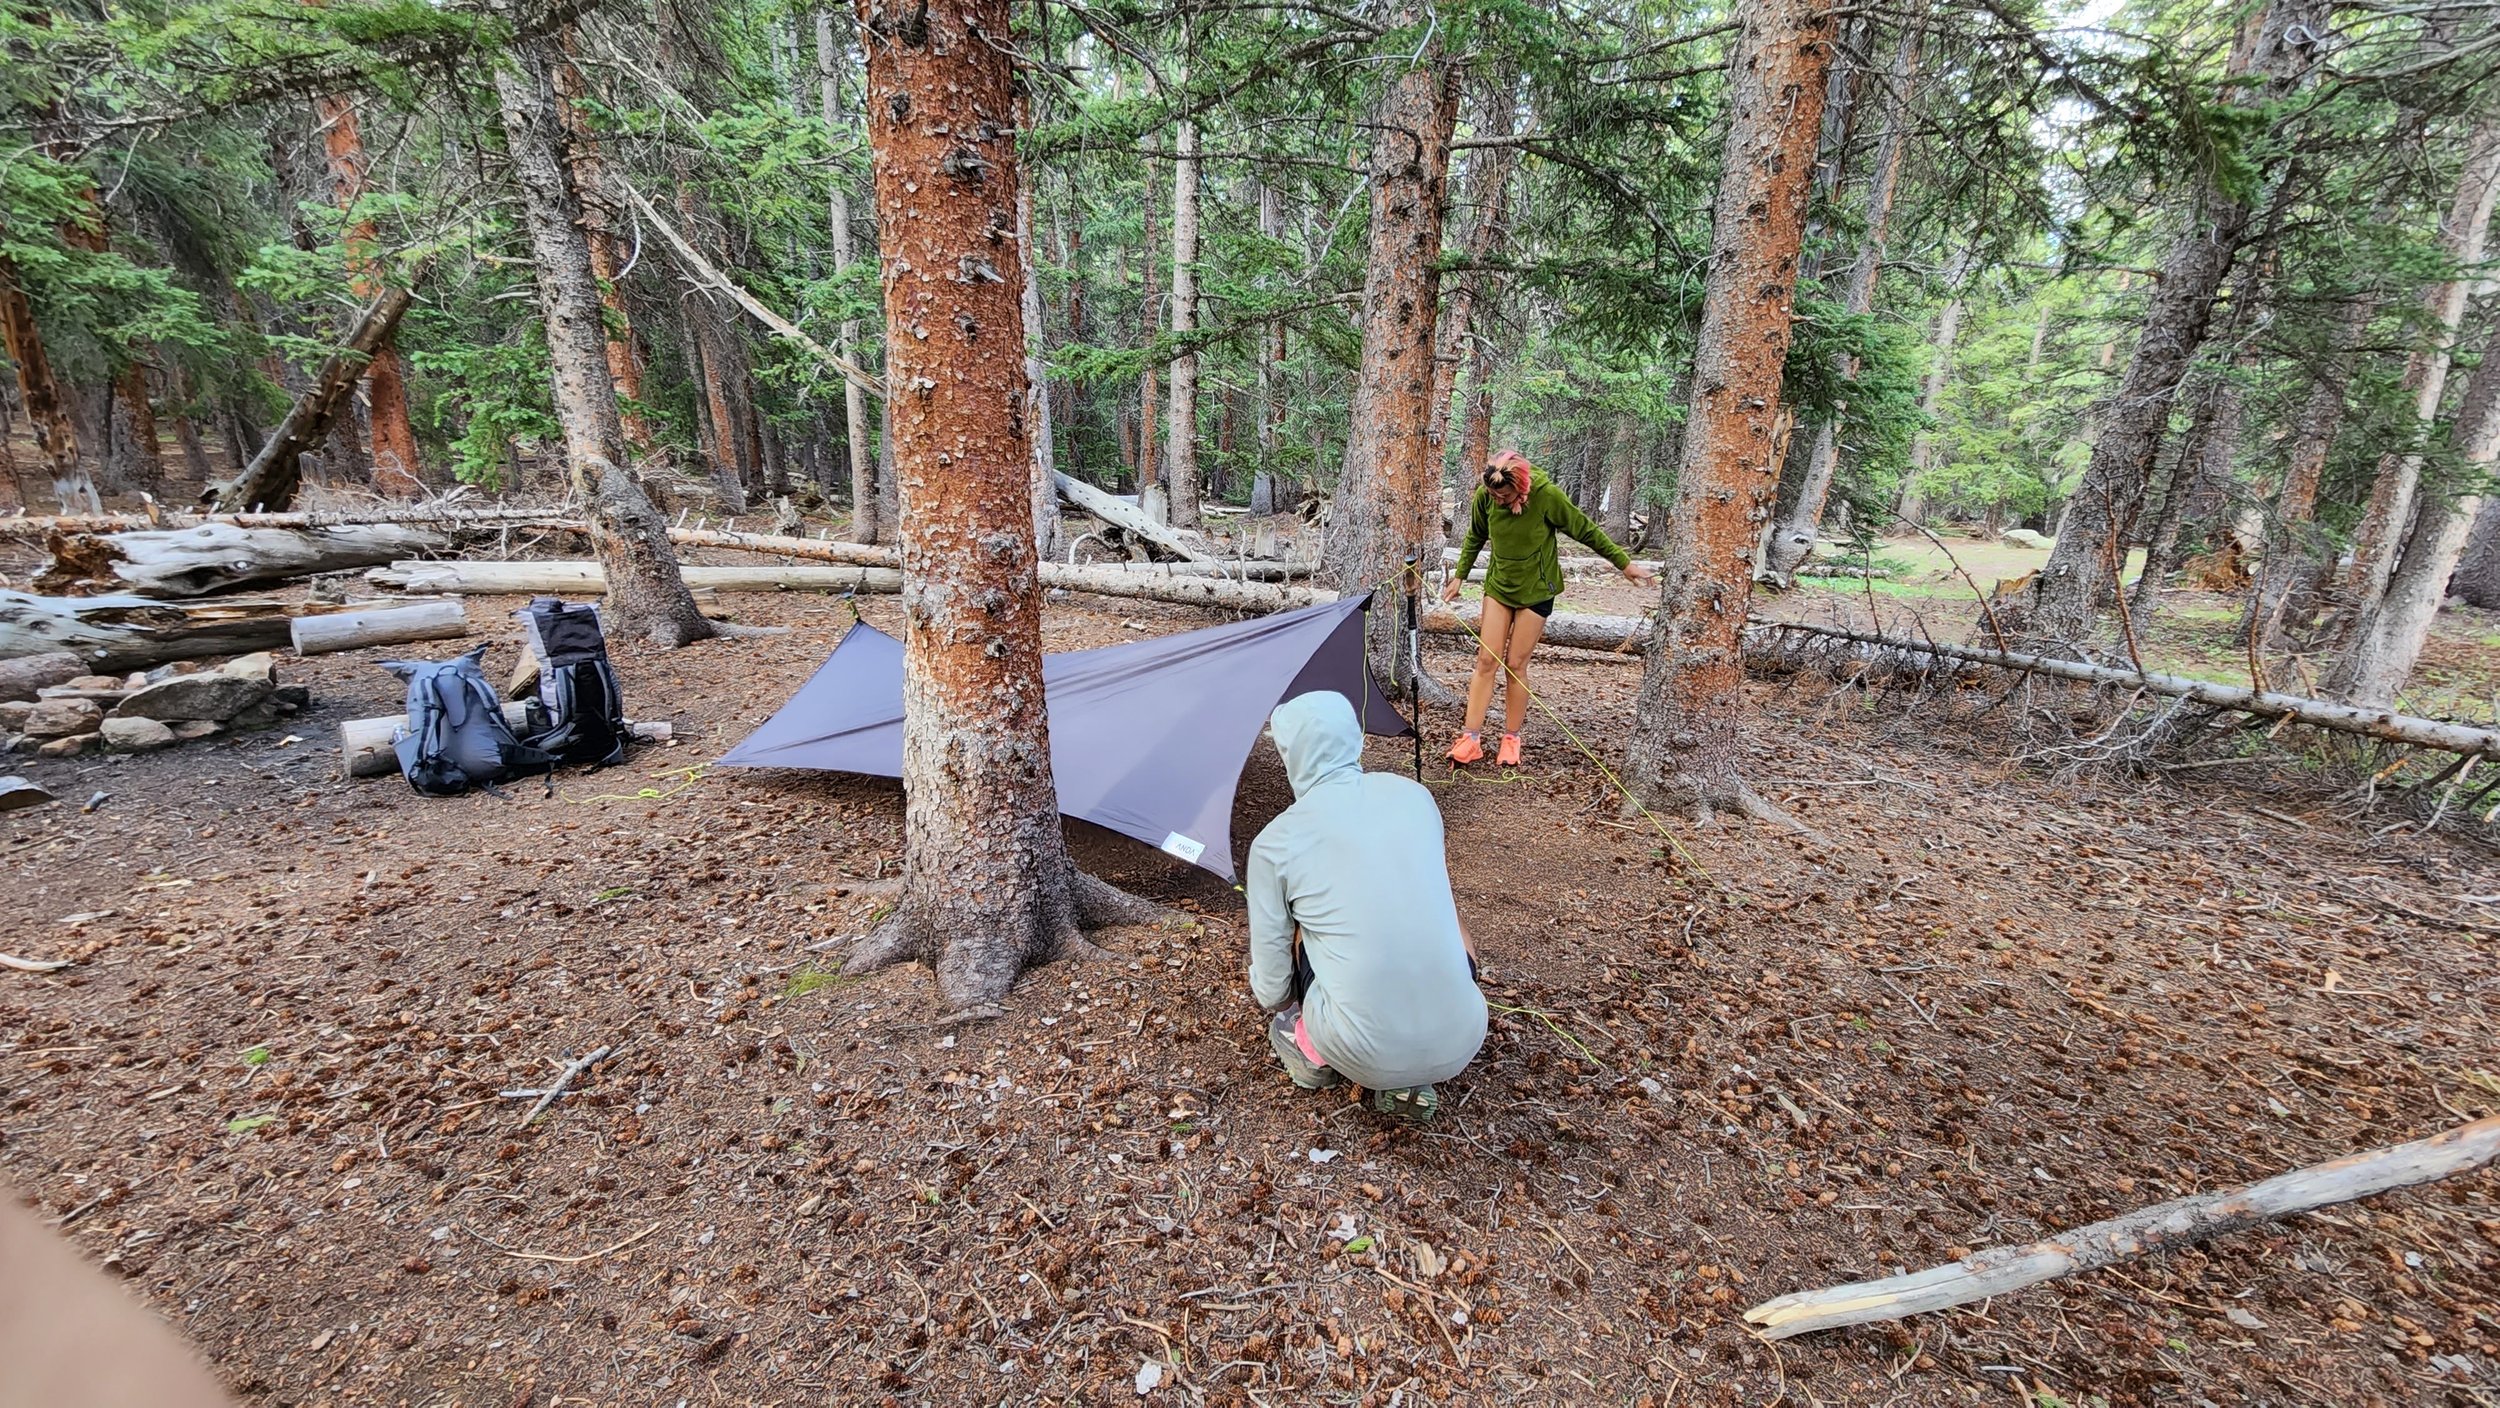
How to Setup Tarp
This video walks you through some options to setup and use your ANDA tarp out in the wild. You can use your ANDA tarp with any bivy but was purpose built to be used with an ANDA Burrito Bivy.
ANDA Tarp & Bivy Setup
-
Fisherman’s knot
Girth hitch
Overhand knot
Bowline knot
Clove hitch
-
Take a 6” piece of guyline and tie a small loop using a fisherman’s knot on each tie-out point. There are eight tie-out points total.
Attach one LineLoc using a girth hitch to each 6” loop at each tie-out point
Start with 8’ of guyline for each ridgeline tie-out, 6’ at each corner tie-out and 3’ at each midpoint tie-out.
Feed guyline through each LineLoc
Tie an overhand knot at the adjusting end of the guyline. This is just a stopper knot.
Tie a bowline knot at the stake end of the guyline with a loop about one finger width
Using a lighter singe the ends of all guylines and shock cord to prevent fraying
If not seam sealed, seam seal the ridgeline on the outside of the tarp. Allow to dry for 24 hours before storing or using.
Your tarp is ready.
-
Two trekking poles (or straight tent poles) and minimum of 6 stakes required, but 8 stakes recommended for windy conditions
If trekking poles are adjustable, set one pole to hip height for head end (or about 48”) and collapse the second pole for the foot end (or about 26”)
Trekking poles can be set up with either handles up or tips up. I prefer handles up with the tips into the ground.
Unfurl that beautiful tarp
Starting at the foot end, make a clove hitch with the guyline close to the ridgeline tie-out, and slip the clove hitch over the trekking pole (whichever end you choose to be the top end) and tighten.
Stake the end of the ridgeline guyline
With one hand holding the trekking pole (or with the pole stuck in the ground if using handle-up / tip-down), stake the corner guylines with the other hand, pulling tension on the tarp equally along the two tarp edges at a 45° angle
Tension lines just enough to keep trekking pole standing
Walk the tarp out along the ridgeline and repeat the process at the head end.
Adjust stake position and guyline tension using LineLocs
Stake out the two midpoint guylines last if conditions warrant. Do not tension these too much so that they change the shape of the tarp. These are to reduce flapping in high wind.
Clip bivy underneath tarp to the inner tie-out loops at the tarp corners using mitten hooks if conditions warrant. See below for bivy setup.
Stand back, smile and admire your beautiful setup.
-
Take a 6” piece of shock cord and tie a small loop using a fisherman’s knot on each bivy corner tie-out point
Take one more 6” piece of shock cord and tie a small loop using a fisherman’s knot on the inner tie-out loop on the head end of the tarp ridgeline.
Start with 5’ of guyline for the head end and 3’ of guyline for the foot end of the bivy
Tie a bowline knot at one end of the guyline with a loop about one finger width
Using the loop on the end of the guyline, attach the guyline using a girth hitch to the inner tie-out loop of the corner of the tarp. Meaning, pass the bivy guyline through the tarp inner tie-out loop, and pass the loose end through the looped end and pull snug.
You’ll need to pitch the tarp to make the final adjustments of the bivy guylines and attach the mitten hooks.
Center the bivy underneath the tarp
Using the free end of the guyline, measure the distance from the tarp inner tie-out loop to the corner of the bivy.
Tie on a mitten hook to the guyline using a bowline knot.
Clip the mitten hook to the shock cord loop on the corner of the bivy tie-out (*Note, if preferred you could flip the bivy guylines around, placing the girth hitch on the shock cord of the bivy and the mitten hook on the tarp inner tie-out loop)
Using a 4’ piece of guyline tie a bowline knot at one end of the guyline with a loop about one finger width
Attach the guyline to the shock cord loop on the head end of the tarp using a girth hitch
Using the free end of the guy line, pass it through the tie-out loop in the middle of the bivy zipper.
Slide the cord lock onto the end of the guyline.
Adjust the cord lock to lift the bug mesh off your head and for entry/exit.
Use corner shock cord loops as stake out points if cowboy camping (without the tarp) in windy conditions
-
All guylines and plastic hardware (LineLocs, mitten hooks, cord lock) are removable and replaceable to your liking. You can lower the baseweight of your tarp and bivy by removing plastic hardware, learning supplemental knots (like the trucker’s hitch), trimming excess guyline or using guyline woven from sustainably sourced unicorn hair or Spider-Man webbing.